Friday, December 30, 2011

Minor progress


Earlier today, I picked up some relays, an overflow hose and a coil at LKQ today. I’m not sure I’ll have time to wire up the relays and a switch, but one fan is mounted. I also picked up some threaded rod, stand-offs and nuts from AAA for the bottom radiator mount.

I mounted the radiator and the other fan. The wiring still needs to be done and I'll get some wire before next Wed so we can finish that.

I tried to start the car and was semi-successful. At first, it wouldn’t start. Then it caught and ran like it was starved for fuel. I checked the fuel filter and it was full. I was able to get it started 3 times this way, but that was it. The charger/booster is on the battery. I checked the coil and it is within spec. The wires are all correct on the HEI module. Ground it there and good. I’m not sure what keeps happening. 

Thursday, December 29, 2011

More starting problems...

I went out to start the car some time last week and it was not working again. The first thing we tackled on Wed was the spark problem. All connections were correct. We swapped HEI modules, but no luck. I tested the coil and it was not within parameters, so we replaced it. That resolved the problem. It started up and ran much better than last time. It bogged down while accelerating up the driveway, but I had no more problems with it.We drove it around the block a few times to see how it was doing and it was much improved. There's still no power, but it is a 30 year old car. The car had 110 hp new. I'm guessing we're at 60-75 hp. Luckily, we have a spare engine that we plan on rebuilding and swapping for more power/reliability, but that's all time and money dependent.

We also swapped in the aluminum junk yard radiator. We ran the car without fans. It didn't overheat when moving, but the temp would climb while sitting.

Today, I hauled the old Datsun 620 truck to the scrap yard. It was loaded down with all the spare metal I could find just to make it worth their while and to clean up the garage. It's kinda sad seeing it go, but it wasn't doing me any good just sitting there. I kept some stuff to sell. If it doesn't sell in the next month, I'll just junk it too. Before I dropped it off the dolly, I pulled the 4 headlights. They are all halogen. I've installed them on the Celi for a free light upgrade.

I returned the wheels we bought 2 weeks ago. They wouldn't take my steelies for a core return, so the aluminum wheels went back. That's $210 saved. I'll check CL and see if I can find a set of 15" wheels for less.

I'm starting to see the light at the end of the tunnel, but there's still a bunch to do. One thing at a time and it will get done.


Friday, December 16, 2011

It's Alive Again!

Wednesday's work session started out like normal. I cleaned up all the grounds in the hope that would fix the spark issue, but to no avail. Ed and Dom showed up, so we pulled the rear shocks and put the Frenchy ones from the Camaro on. It helps some, but the springs are just shot and they need to be replaced. It is an improvement though.

About that time Ken showed up. We started troubleshooting the spark issue and his eagle eyes noticed a difference in the mounting holes in the HEI module. One hole had more metal around it and it went into the module. This, apparently, is the actual ground. Once we moved the ground connection to it, the engine fired up. So to review, there are 2 mounting holes on the HEI module. One is ground, the other is not.

After getting the car running, I drove it around the block. It was bogging down under acceleration. We sprayed carb cleaner around the carb base to check for leaks and there were a few. We pulled the carb and put gasket sealer on. Another quick trip around the block shows are still having problems with bogging on acceleration. We'll tackle that some time after the holidays.

I'm happy the car is running again. We have better shocks and the cage is almost all done.

I'll be in Charlotte on Monday and will stop by the pull a part. I'll see if I can pick up some rims, an aluminum radiator with electric fans and a 3rd brake light for mounting on the roof.

Saturday, December 10, 2011

Junk Yard Visit

The crew met at the local self service JY this morning. Ken came along to supervise and offer wheel advise. We were looking for 4 things: coil with ignition control module, rear shocks from a Camaro, a radiator and 15" wheels. We did not find the coil and ignition module.

We found 2 sets of shocks. The first was hydraulic and had no return. It was stiff on the compression though. The second set we found were gas and had good compression and return. They look fancy, but really, they were from a Camaro!


Even better, they were made in France!


We did pull an aluminum radiator with 2 fans out of a Nissan.


We also found some descent 15x6 wheels from another completely unrelated Nissan. They are aluminum wheels with crappy, dry rotted tires. They made me purchase the tires as I had no way to pull them off.


They do rub the shock tower, so we'll need spacers.


And we'll need longer studs, you know, so the lug nuts don't fall off and let the wheel have it's freedom.

The spacers will also help with keeping the wheel away from the rest of the car during heavy loads. This is fully turned in while on the ground. There is just barely enough space to put my littlest finger between them.


And for Ed, just because. These are from a Saab 900 turbo. The offset it too large and would require longer studs but no spacers. They are 15" wheels and the tires are skinny enough that they don't rub the shocks.


Since there is plenty of space in the wheel wells, I'm going to investigate 16" wheels. This will allow us even more tires choices. Hopefully it won't cause an issue with rubbing, but we'll figure that out if it does. 

Friday, December 9, 2011

Cold, but not Rochester Cold

First, A big welcome to our new team member, Dom. He's joined us while on the lam from the Upstate NY weather.

We worked on the spark problem and it seems like the ignitor module is dead. Everything else checks, but we're just not getting any spark. I probably fried it when I was messing with the HEI module install.

We did get the front shocks replaced. The old ones were just dead. No return or resistance. The car was relying on the springs for suspension. The new ones were more like a modern shock absorber cylinder that slides into the strut case. It's a good replacement for the built in set. The seals were shot on the existing shocks. While it may have been fun to repair/replace the seals in the old ones, I prefer the direct replacement of the modern shock. We did not cut the springs. I'm going to get some 15" wheels and see how they fit, then decide on lowering the car.

Dom tacked in another drivers side door bar. One more on that side and we'll be done. I still need to get the driver's side bars bent and they will be ready to go.

I read on the Lemons forums that CMP would be full course. Wow, oh wow, that would be a great course to drive. The short course looks fun, but the 2 back straights would be awesome. I haven't driven them, but I did walk them.

Thursday, November 17, 2011

Gas Tank Uppdate

Hopefully with this last round of work, we've gotten the fuel issues sorted out. We pulled the tank last night and managed to drill some holes in the sump wall. One hole for each wall, or there about. Tested the fill rate by filling it with water and seeing how fast the sump filled. It look good. Tank was bolted back up and everything reconnected. That was the last thing we did that night.

The three other items had varying degrees of success.

I was able to tighten the steering box down as far as it would go and that helped. It still needs a ball joint on the pittman arm.Oh heck, it needs new ball joints and rubber all around.

I need to widen the bolt holes in the harness mount so I can put a sleeve in there to allow the mount to move. I also need to drill and mount the anti-submarine belt.

And the first thing we worked on was trying to change the differential oil. The fill plug was stuck and now it's stuck and stripped. A quick internet search reveals many options for fixing it. I think I'll weld something onto the bolt and go from there. Wish me luck!

Saturday, November 12, 2011

Movin' On Up

I worked on the car today to get it ready for a car meet tomorrow at CU-ICAR. I got the sill bars tacked in and 2 of the right door bars. I installed the seat and 4/5ths of the harness. I mounted the shoulder straps and the left and right straps. I used the existing seatbelt mounting holes. I did not mount the anti-submarine belt.

I also dropped another fuel pickup line in the tank. I tried to get the electric pump to pull from it, but it was having problems. I hooked up the mechanical pump and it worked great! I got the car out of the garage and up to temperature. I took it down the block and back. It had a squeaking sound in the rear wheels that ended up being mis-installed brake springs. I also noticed a coolant leak in the radiator.I ran some sea foam through the system, but it was coming out as soon as it sucked it up. The great part is that some of the smoke came from the exhaust header where the cracks are. Those are some serious cracks that need to be fixed.

My impression from the test drive: It's a terribly, wonderful crapcan. There's too much play in the steering. The shocks bounce and bounce and bounce, then bounce some more. The front right brake locks up under hard braking. And there is very little power, probably from the exhaust header leak.

We still have some work to do, but it's looking better!

Thursday, November 10, 2011

Breakthrough!

I installed the diagonal and harness bar last night. Until the door bars come, that's the last of the cage for now. I can almost see an end to this part of the project.

Ed showed up and helped me with the harness bar and then we moved onto getting the car running. We did some additional troubleshooting with the fuel pump. We moved the electric pump back to the engine compartment and wired it to run when the key was turned on. We installed a see through inline fuel filter to monitor the fuel flow. We got the car started and it ran. And ran. And ran. It ran until the temperature gauge actually lifted off C and settled in the middle of the gauge. Around this time, the fuel filter ran dry. The pump was still running and spitting a little bit of fuel in the filter. After about a minute, the car stalled and died. The fuel gauge was showing almost 1/2 a tank of gas. We pulled the sending unit out of the tank to see what the heck was going on. Well, the tank had plenty of gas, but the sump, where the sending unit sucks up the gas, was empty. Huh? That's right, there's a self contained sump (for lack of better word) in the tank where the fuel pickup (or old electric pump) would sit. I think it's there to allow fuel pickup during turns, acceleration and braking. I put on a nitrile glove and stuck my hand in to see how the gas got in the sump. There's a small metal tube on the very bottom that goes to another part of the tank and pulls fuel from there. So the tube must be clogged. I tried to run a stiff wire through the tube, but there's too many right angles and not enough room to get a good grip with the gloves on. I then tried a plastic tie wrap. I was able to get it about 6-8 inches in the tube before it stopped. That still didn't allow the sump to fill up.

Grrrrr...What next? I'll call a few radiator shops and see if they can clean the tank. Is it possible to get the tank split in half and see what the real problem is? If not that, then a fuel cell may be the next option. There are some on sale through Lemons. A 15 gallon cell would be just under $600. That's out of the budget, so we need to make the existing tank work.

This has been one of the best work sessions in terms of problem resolution. The car ran for an extended period and then we discovered why it was dying. We wouldn't be at this point if it weren't for all the people that have come over to help look at the problem: Ken and Ed S. and of course my constant team mates, Eric and Ed G. That's about all the internet fame I can offer you guys at this point. :-)

Sunday, November 6, 2011

Electric pump good! Connections bad!

I spent Saturday afternoon tearing the front of the riding mower apart to reattach the muffler. The previous owner had attached it with bolts without lock washers. One of the bolts decided to use that as an opportunity for freedom. I got the muffler reattached. I also notice the new carb bowl was leaking at the solenoid. I tightened it down just enough to crack it. Looks like time for a new carb bowl. This will be the 2nd bowl this year.

I also tested the electric pump on the Celi. It flows very well when pulling from a gas jug. And it flows when pulling from the tank line. I hooked it up to the tank in the rear with the electrical connections, but it wasn't turning on. So either the relay or oil pressure sensor is having issues. Maybe I'll just leave it in the engine compartment?

With this, I'm guessing the carb is getting flooded. I'll see if I can add a T with a smaller outlet to allow the excess to return to the tank. That would be a godsend if it solved the problem. More next week after the next session.

Thursday, November 3, 2011

More progress...

Ken and Ed knocked out the back stays last night. They look good tacked in place.


I need to get new door bars and sill bars from Roll Cage Components. The first set was too short. I pushed the main hoop back about 10", so we would have more room in the cabin. While we wait for them to arrive, we can put the diagonal and harness bar in.

I made a list of To Do items and put it on the roof of the car. This will help focus the work on things that need to be done. They get marked off as they're done. Feeling of accomplishment: Accomplished!


We ran out of gas for the welder. Luckily National Welding is just down the road from work. A quick stop on the way in and $45 later, we're set to weld again.

Lastly, I welded the old emission holes in the exhaust manifold. The car sounds completely different. It's quite and seems to run better. We are still having a fuel delivery problem. It would run some with the mechanical pump, then die. It did the same thing with the electric pump. I'll get a pressure gauge and see if there's a pressure problem.


Tuesday, October 25, 2011

Barely Legal


I got the paperwork processed at the DMV today. I have a normal tag while I wait for them to send me the antique plate. That and the title should arrive in a couple of weeks. Antique insurance is a low $25 per 6 months. The restriction on the plate is that I can only drive it to and from events.

From the SC DMV site.

To obtain an antique license plate, your current title must be surrendered and the department will issue a new title marked Antique. The fee for a new title is $15.00. To qualify for an antique license plate, the automobile or motorcycle must be at least 25 years old. The vehicle is to be used in club activities, exhibits, tours, parades and similar events, but shall not be used for general transportation. When the vehicle is sold, junked, or otherwise disposed of, you must surrender the antique license plate to the department. The fee for the plate is $10.00.

Thursday, October 20, 2011

It's Alive! (No, really, it is!)

We had a full crew last night. Ed from work joined, Ed, Eric and myself. We went through the whole troubleshooting procedure for a car that won't run. Fuel to the carb, electronics, TDC, timing, etc. We ended up correcting a few things.
1. Replaced the existing coil with a JY Bosch coil from a BMW.
2. Replaced mechanical fuel pump with another mechanical fuel pump.
3. Added the rest of the test gas to the tank, about 2 gallons. We may have a pickup problem, but It's pretty darn low in the tank. I may be able to get another 1/4" down.
4. Determined the gasket leak at the carb base was causing stalling problems. This will be fixed with a new gasket or some copper sealant.

It was a very good night. We were able to get the car to start repeatedly and run for more than 2 minutes at a time. I noticed the instrument cluster would work sometimes, and sometimes it wouldn't. We'll investigate that if it continues to act up. I image with the removal of most of the dash and the multiple unpluggings, we could have jiggled something loose.

I am very happy the car is running. I think the only thing that kept me from test driving it around the block was the 3 cars blocking the driveway. And that was a good thing.

Now to finish the cage and go through the punch list.

Monday, October 17, 2011

(B) Time for some head work

The Beemer has been acting up the last week. I had three things going on: low on coolant in the morning, white smoke at start up, and sometime it wouldn't turn over, it would just sort of "clunk" when I tried to start it. I ran a compression test and it came out at 205, 205, 205, 300(!), 205, 135(!). So I've got 2 bad cylinders. Looks like I'll be doing a head gasket at the least and a head replace/repair at the most. Parts are about $400-$500. That beats paying a shop $2500-$3000 to do the work. I know this, because I had head work done about year and a half or two years ago. I guess the oil change and Seafoam knocked something loose in the car.

(P) Out with the Front Differential!

In my ongoing attempt to fix the front right axle leak, I ended up pulling the front differential to convert the car from an AWD to RWD. I found a really helpful thread at http://www.6speedonline.com/forums/996-turbo-gt2/51662-rwd-conversion-complete-one-word-awesome.html. If it's good enough for the 996TT guys, it's good enough for me! In reality, I needed to get a car working that I could drive to work and I hated seeing my Porsche up on stands. I had to enlist the aid of Ken to help me get the wheel stub flange off the axle. It has the speed sensor ring on it, so you have to put it back in. Overall, an easy mod to do. It took me about 6 hours.

Thursday, October 13, 2011

Should've spent the evening drinking beer...

I reran the power wire for the external control/ignition panel. It then proceeded to melt the wimpy ground wire when trying to start the car. I reconnected the keyed ignition switch and it worked with no problems. I'm trying to remember why I put the control panel in and my memory fails me, so it will come out permanently.

Ed and I were able to get the car started and running. I had to keep my foot on the gas or it would die. Which it did when I got out of the car and let it idle on its own. With the exhaust heat shield and emission pipping off, it sounded pretty throaty for a 32 year old inline 4 engine. We'll plug the 2 emissions holes and other cracks on the exhaust manifold to fix that. We tried to restart the car, but it wasn't playing nicely again. It did kick over with starter fluid, but seems like the carb isn't getting gas. I think I'm going to wire and plumb the external fuel pump.

On the cage front, we worked on getting a backstay in, but I was unable to get my brain to engage and figure out the angle of the cuts to make it work. We got it almost there and decided to call it a night. A bit frustrating, but that's how it goes some evenings.

I also discovered our door bars are too short! We set the main loop back as far as possible, and our door bars are about 8-12" too short. I'll contact the roll cage guy and see what he says. I'm up for just doing this locally. We probably won't get to them until after the first of the year at this rate, so I'm not stressing on it.

A big thanks to Ed for putting up with me and we hope to see Eric next week!

Thursday, September 29, 2011

The continuing saga of BMW brakes...

The hold down clip on one parking brake came loose when I went over a speed hump. It made a lot of nice grindy noises and got chewed up real good (as we say in the South). So, I removed the shoes and hardware from that side. Well, I forgot to remove, or otherwise secure, the shoe spreader that's attached to the parking brake cable. I started in for work and got about 3 blocks from the house when it broke loose and caused all kinds of havoc. I completely destroyed the spreader and damaged the dust shield. I've got the shield bent back into place and all the metal bits cleaned out. Now I have no spreader on that side and I'll have to get a new cable and spreader.

Lesson learned.

Weber Part II

I ended up pulling the intake manifold yesterday. I need to remove smog attachments on the manifold and hoses that run under and around the manifold. I'm going to plug the ones I pull off the manifold. I also need to make a few block off plates for the smog equipment that was attached to the block. I really shouldn't be amazed at how much carbon builds up on a 30 year old car.

Work may be slow for the the next week as we've got a lot of family stuff coming up.

Tuesday, September 27, 2011

Weber part I

Ed and I installed the Weber 32/36 carb last night while Eric is away at a spa vacation business conference. It looks so shiny sitting on a 30 year old engine. We plumbed it as best we could and had to get the jumper cables out to start the car. Looks like the used battery is on its last legs. The car ran for 3-5 minutes. I had to keep on the gas, as it would not idle. Eventually it did die and we couldn't restart it.

I'll go over all the connections again. The Celica forums have some good information and I'll reread them to see what I missed. It may be as simple as a vacuum line missing.

Monday, September 26, 2011

BMW brakes next...


I wasn’t sure I was going to make it in this morning. I changed the brakes on the BMW this weekend and they were acting up. Nothing like random “clunking” when you’re driving to get the adrenaline flowing. I think I’ve got it fixed. I backed the parking brake out some and the "clunking" seems to have stopped.

I put on 4 new rotors, pads and attempted to replace the parking brake shoes. For some reason the new (and old) rotor won't fit over the new parking brake shoes. I'll call Rock Auto about that today. I put the old shoes on until I hear from them. 

Friday, September 23, 2011

Cage, part something or other

I shanghaied Eric into helping me bleed the van brakes last night. There was a lot of air in the line where I replaced the rear brake cylinder. The pedal is firm now. Now on to the real work.

Ed joined us last night. He'll hold the moniker of new guy for a while or until he recruits some other work mates to join us. We were able to get the plates in for the front down bars and the actual front down bars. Eric really loved the front down bars. How do I know? Well, he spent so much time grinding and cutting on them to get them just right, that's how I know! I feel like we've accomplished a lot with the main hoop, roof loop and fronts in. From there, I expect it will go pretty quick to get the rest in. I'm thinking 3 more work sessions to finish the cage, then a Saturday with the big welder to make it stay.

Now I'm off to research backstay installation. Needs to be at a 45 degree angle, but I want to get the attachment points right.

Plus there should be a package arriving in the mail soon!

Wednesday, September 21, 2011

Another side project

I had to replace the brakes on the 2001 Honda Odyssey because they were getting squeaky. I put the van on jack stands, pulled the tires and started pulling the front rotors off.

I wonder why they were so squeaky?


Not only that, but the caliper guide pin for the passenger side was frozen. The rubber sleeve on the inside was destroyed and made it difficult to extract. I've sourced one locally and should have it back together before lunch.

And the rear passenger brake cylinder for the shoes is leaking. That's getting replaced too.

The third and final piece to the brake madness is the motvie power bleeder I have does not have a good attachment for the master cylinder, so I'll be bleeding these the old fashioned way.

On the plus side, the $10 headlight lens cleaner kit I got from Harbor Freight worked great in cleaning up the lights.

Wednesday, September 14, 2011

More cage

Eric stopped by and helped me get the roof loop cut and tacked in. It was a short session. Next week we're going to move to Thursdays for the foreseeable future. Work will continue on the cage with the front down bars going in next, then the back down bars and the door bars. Then we'll get the big welder (queue Ed) and get it finished. Seems like a little bit of work, but we're slow, so I'm predicting a December finish.

Friday, September 9, 2011

Sketchy carb is here!


I received the sketchy weber from CA. And it is as sketchy as you would expect for $30 shipped. The throttle action is a little sticky from its rusty “character”. The choke is hardwired open. I have no idea about the bowl, as there is no sight glass. It’s a 32/34 DFT and not a 32/36. I haven’t been able to find any good documentation on it yet. I’ll try pulling it apart and checking the bowl condition and then just hooking the thing up to see how it does.

Thursday, August 25, 2011

More of the same...


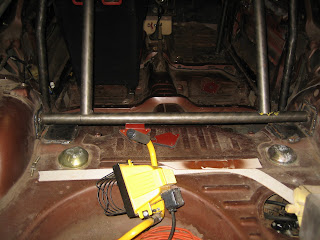
The work we did last night was prep work. We cut out the dash for the front down bars, cleaned the floors and started cutting the plates. It was a short night for us, maybe 90 minutes of work. It looks like we’ll put this cage in with a hand cutoff tool, wire brush drill attachment and small welder! Actually, I have a car friend at work that has a nice 230V mig welder he’ll let me borrow when it’s time to melt the cage.

Still no word on the sketchy weber…